
How a Mini-Split Cools an Adobe or Thick-Walled Home
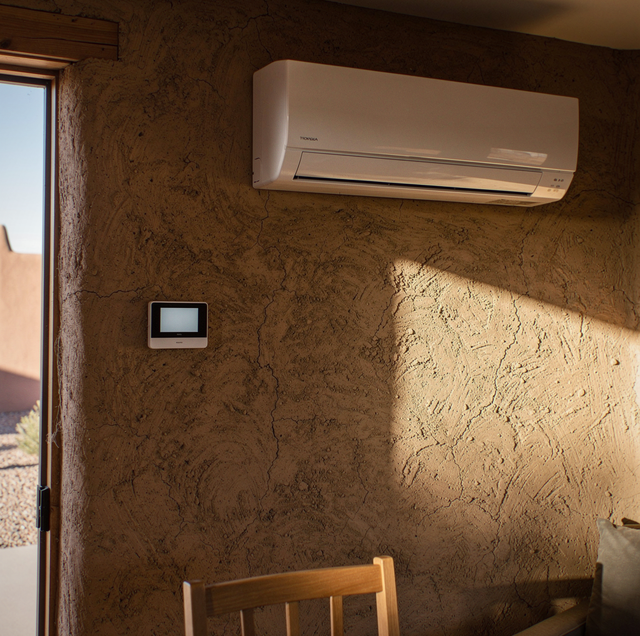
An older home built with thick earthen or masonry walls was designed around a different kind of comfort than central air was ever meant to deliver. Those walls hold heat and cold for hours; the floor plan was rarely drawn with a chase for sheet-metal ductwork in mind; and additions built onto the original structure over the years often have no way to tie into the existing ducts. When a whole-house system can't reach every room evenly, or there's nowhere to run ductwork without opening finished plaster and stucco, a ductless mini-split solves the problem from a different direction: it cools room by room, with no ducts required.
Why Thick Walls and Older Layouts Resist Central Air
Central air depends on a network of supply and return ducts moving conditioned air from one central air handler out to every room. That network needs continuous space to run through, usually a joist bay, an attic, or a dropped ceiling, plus a return path back to the equipment. Homes built with thick, load-bearing earthen or masonry walls and low-pitched or flat roofs often have neither. The walls can run well over a foot thick, solid enough that there's no stud cavity to hide a duct trunk inside, and a flat roof leaves no attic void to route one overhead.
Layout compounds it. Many of these homes were built in stages: a core structure first, then a bedroom wing or sunroom added later, with no provision for shared ductwork, so even where the original section has duct runs, they rarely extend cleanly into the newer wings. Retrofitting ducts into a house like this means cutting into finished plaster, losing ceiling height to a dropped soffit, or opening a wall never designed to be reopened, work that is disruptive and, on a load-bearing masonry wall, sometimes not structurally practical at all.
How a Ductless System Cools Without Ductwork
A mini-split sidesteps the ductwork question entirely. An outdoor condenser connects to one or more indoor heads via a refrigerant line set, insulated copper tubing, a control wire, and a condensate drain that passes through a single wall opening rather than a full duct chase. That opening is a round core drilled through the wall behind where the indoor unit hangs, and once the line set is routed and connected, the hole is sealed and finished to match the surrounding wall. No trunk line, no branch runs, no return grille cut into a ceiling.
Each indoor head is its own cooling unit for the room it hangs in: it draws in room air, passes it over its evaporator coil, and pushes cooled air back out through its fan, without relying on air drawn in from elsewhere in the house. That's the mechanism that lets a mini-split cool an add-on bedroom or a sunroom a duct system never reached, since the indoor head only needs a line set back to the outdoor condenser, not a connection to the rest of the house's air distribution.
Zone-by-Zone Comfort for Rooms That Never Agree
Because each indoor head runs on its own thermostat, a mini-split naturally divides a home into independent zones rather than forcing the entire structure to one setting. In a house where interior rooms sit behind feet of thermal mass while a newer addition has thin, uninsulated walls, the two spaces heat and cool at very different rates over the day, and a single central thermostat can only chase an average between them, leaving one room too warm and the other too cool no matter where the setting lands.
A multi-zone mini-split lets each room run its own program. The interior room, steadier because of its mass, can run a light, infrequent setting, while the addition runs harder and more often, without either space compromising for the other. It's also the practical answer for a home where only part of the floor plan needs conditioning on a given day: a guest room used occasionally doesn't need to run at all, and shutting its head off costs nothing while the rooms in daily use keep cooling normally.
Efficiency Inside Walls That Store Heat
Thick masonry and earthen walls behave differently from a typical stick-framed wall. They absorb heat slowly through the day and release it slowly after the outdoor temperature drops, smoothing out the sharp afternoon peak a lighter-framed room would feel, but also meaning the cooling load doesn't fall off as fast in the evening as the outdoor air does. A system built to run at full output and shut off again is a poor match for that slow, steady load; it either overshoots the room or short-cycles chasing a small, gradual change.
Most mini-splits use an inverter-driven compressor, its speed ramping up and down continuously to match the load rather than cycling fully on and off, a trait that fits a high-mass wall well: the system holds a steady, moderate output through the evening while the walls are still releasing stored heat, instead of overcooling in bursts. The tradeoff runs the other way too, on a day with a wide swing between a hot afternoon and a cool night, that same mass keeps radiating stored heat into the room well after the outdoor air has cooled, and a zone that's run low all day may need a longer stretch at higher output that evening to catch up.
Wiring Realities in an Older Electrical System
An older home's electrical panel was sized for the loads that existed when it was installed, a number frequently smaller than what a modern household draws once cooling equipment, appliances, and electronics stack on top of the original circuits. A mini-split's outdoor condenser needs a dedicated circuit sized to its nameplate load, and on a panel already running close to capacity, adding that circuit can mean there isn't headroom left without upgrading the panel or service first, worth checking before assuming the project is a simple one.
Wiring type matters as much as panel capacity. Some older homes still carry sections of original wiring an electrician needs to account for when running a new circuit, since it wasn't rated for the same continuous loads or installed to current spacing and grounding standards. None of this rules a mini-split out; it means the electrical side of the job needs its own look before installation day, and skipping that step is how a simple install turns into an unplanned panel upgrade mid-project.
What the Installation Actually Involves
Installation on a thick-walled home starts with the wall itself. On a stud wall, the core drill for the line-set penetration goes through in one pass; on a wall built from solid adobe, rammed earth, or block running well over a foot thick, the same hole may need a longer core bit or a two-sided approach, drilling partway from each face to meet in the middle, and the finished opening usually gets an insulated sleeve so moisture doesn't wick through the exposed material around it.
Mounting the indoor head and its bracket also changes on a solid wall. Standard drywall anchors don't hold in masonry or adobe, so the installer uses masonry-rated anchors. Condensate drainage sometimes requires a small pump rather than a gravity line if the wall is too thick for a straight downward slope. Outdoors, the condenser needs a stable pad or a wall or roof bracket rated for its weight, and on a flat or low-slope roof without attic access, that placement often ends up roof-mounted rather than ground-mounted. None of these steps are unusual for an installer experienced with older construction, but they take longer to plan than a standard stud-wall job.
Weighing the Tradeoffs Before You Commit
A mini-split isn't automatically the right call just because a home lacks ductwork. It adds a visible indoor head to every room it serves; each head needs its own periodic filter cleaning, and a house with many small rooms needing independent cooling can end up needing enough heads that the simplicity advantage over central air narrows. Central air, where it's even feasible to install, still wins on hiding equipment behind flush vents and running the whole house through one filter and one thermostat.
Against that, a mini-split avoids the structural disruption of cutting ductwork into walls that may not tolerate it, gives every room its own setting regardless of how differently the surrounding walls hold heat, and adapts output continuously rather than cycling hard. For a house where the walls themselves make traditional ductwork impractical, that combination usually tips the decision, but it's worth having a technician walk the specific rooms, panel, and wall construction before settling on a system.
Frequently Asked Questions
The line-set penetration itself is usually the same standard diameter, close to three inches, regardless of wall type, but the depth changes everything. A stud wall takes one pass with a standard core bit; a solid earthen or masonry wall can run well over a foot, sometimes close to two feet, thick, so installers often drill partway from each face with an extended bit and meet in the middle, then fit an insulated sleeve into the opening to stop moisture from wicking into the surrounding wall material.
It depends on how much headroom the panel already has. Many older homes were wired with a panel sized around 100 amps for the loads of their era, and a multi-zone outdoor condenser draws a load in roughly the same range as a central AC compressor. A single-zone head is often light enough for the existing panel to handle, but a full multi-zone system covering several rooms can push a near-capacity panel beyond what it can safely carry, which is why a load calculation, not a guess, determines whether a circuit addition or a panel upgrade comes first.
The mounting bracket for an indoor head typically anchors with four to six masonry-rated screws driven into the wall material rather than the wood-screw anchors used on drywall, and the line-set penetration is one small round opening rather than an open channel. Installers generally patch that opening with a color-matched stucco, plaster, or earthen-plaster repair once the line set is sealed, so the visible finish work is one small patch per head rather than reopening the wall along a run.
Most manufacturers cap the line set at around 50 feet of horizontal run and roughly 25 feet of vertical lift between the outdoor unit and an individual indoor head, though exact limits vary by model and by how many heads share a single condenser. A thick wall eats into that allowance more than a thin one does, since a two-foot-deep penetration through solid adobe or block uses up line-set length before the tubing even reaches open air, which is one more reason head placement gets planned against the wall section it will pass through.
Earthen and adobe walls act as a natural humidity buffer, slowly absorbing and releasing moisture along with heat, which tends to keep swings gentler than a lightweight wall would allow. A mini-split still pulls moisture out of the air passing over its evaporator coil, the same basic dehumidifying action any AC provides, but because the inverter-driven compressor often runs at a lower, steadier output rather than cycling hard, it can move less air across the coil during a short stretch than a system running in strong on-off bursts, so some installers set a dedicated low-fan dry mode for stretches when humidity control matters more than raw temperature.
A mini-split is a heat pump, so the same equipment that cools in summer runs in reverse to heat in winter, rated on a separate HSPF2 efficiency figure from its cooling SEER2 number. In a home with thick walls that release stored warmth slowly overnight, that heating mode can pair well with the mass, holding a room at temperature with less cycling than a house with thin, fast-losing walls would need, though very cold overnight lows can still call for a cold-climate or hyper-heat rated unit to keep output from fading right when the heating load is highest.
Wondering if a mini-split fits an older or thick-walled home? — A technician can look at your walls, your wiring, and your layout, then recommend the right zones. Hi-Tech Heating and Cooling serves Albuquerque, Rio Rancho, and Corrales. Call (505) 398-4398.
